
Retail Store Fixture Planning Checklist
A retail store fixture checklist turns a floor plan and product list into an order that can be measured, quoted, delivered, installed, and used. It prevents the common mistake of choosing attractive individual fixtures before deciding what each store zone needs to accomplish.
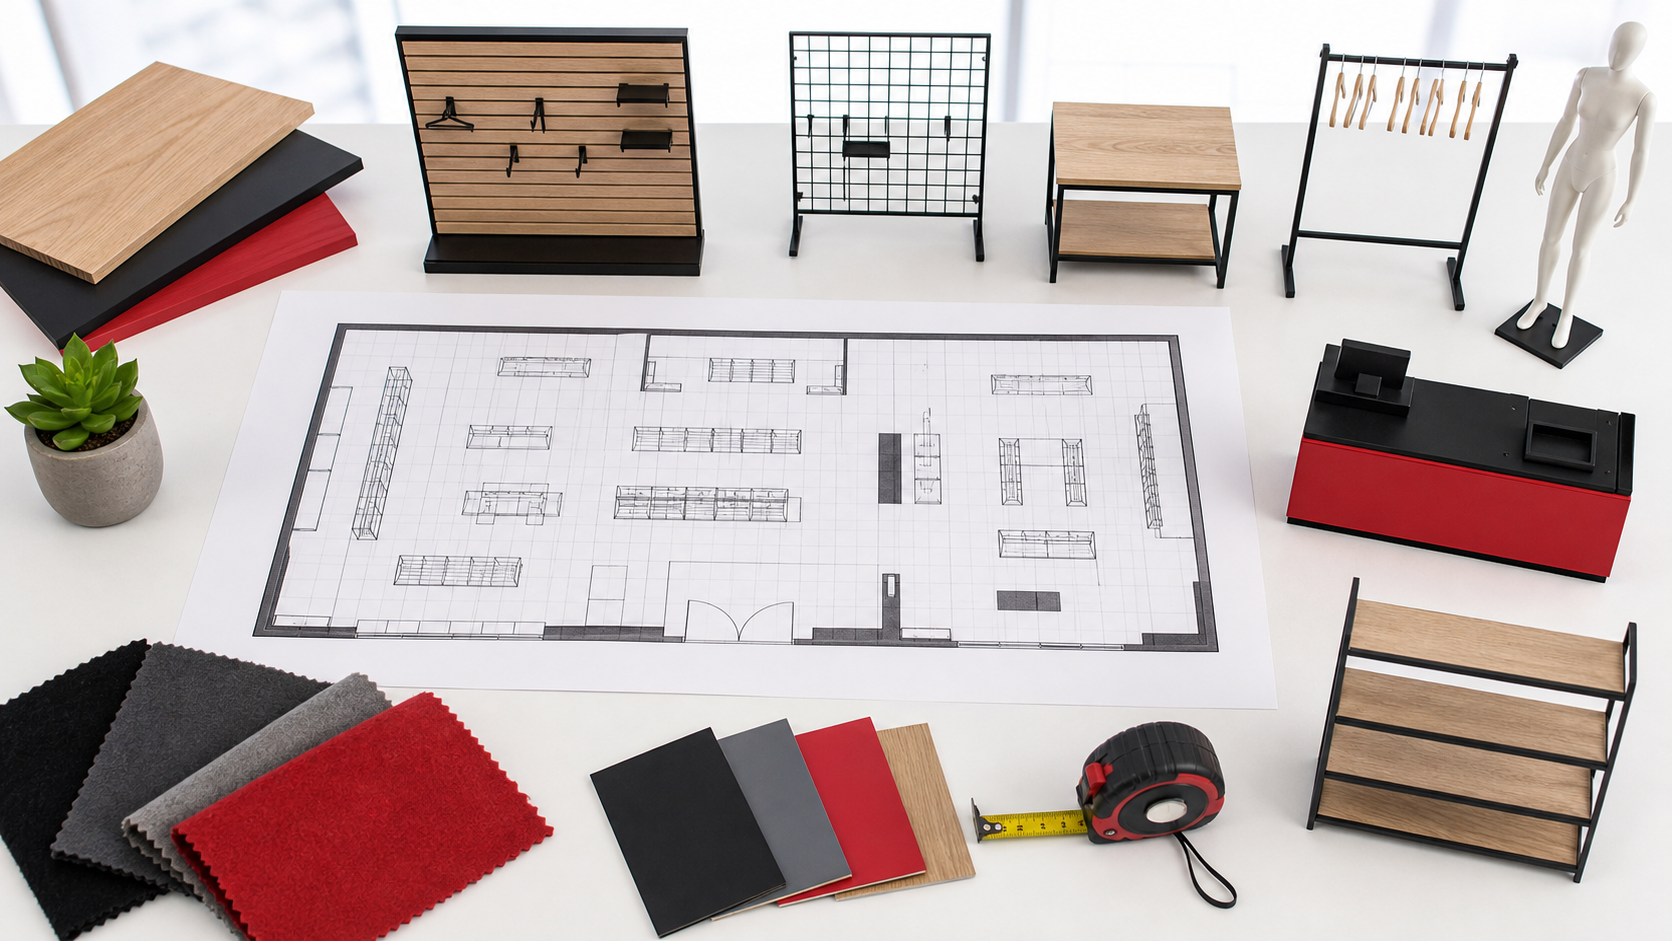
This checklist is designed for independent retailers, boutiques, sporting goods stores, gift shops, apparel stores, specialty stores, pop-ups, and store remodels. Use it alongside the complete retail store fixtures buyer guide.
Printable worksheet: use your browser's Print command to print this checklist or save it as a PDF. Record project details, fixture zones, quantities, site checks, delivery requirements, and final approval as the plan develops.
Store Fixture Checklist at a Glance
- [ ] Define the store format, product mix, opening date, budget range, and decision owner.
- [ ] Measure the store and mark entrances, exits, windows, columns, checkout, fitting rooms, stock access, utilities, and usable wall runs.
- [ ] Divide the store into merchandising zones and assign each zone a selling or service job.
- [ ] Select wall systems, floor fixtures, cases, counters, mannequins, signs, and specialty displays by zone.
- [ ] Build an accessory and component schedule instead of ordering panels, racks, or tables alone.
- [ ] Confirm finish samples, dimensions, compatibility, quantities, substitutions, and approval status.
- [ ] Review customer circulation, accessible routes, checkout access, staff replenishment, and emergency egress with qualified local professionals.
- [ ] Confirm freight, receiving access, assembly, anchoring, electrical work, installation, packaging disposal, and damage documentation.
- [ ] Inspect the completed store before merchandise hides missing parts or placement errors.
1. Write the Store Brief Before Shopping
Start with the merchandise and operating plan. The fixture list should follow those decisions.
- [ ] Record every major merchandise category.
- [ ] Note whether products hang, fold, stack, peg, sit on shelves, require security, or need enclosed presentation.
- [ ] Estimate the amount of product each zone should present, not only what is held in back stock.
- [ ] Identify seasonal categories and areas that will reset frequently.
- [ ] Mark high-priority products, new arrivals, impulse items, and higher-value merchandise.
- [ ] Decide which zones need flexibility and which can use more permanent fixtures.
- [ ] Name the person authorized to approve dimensions, finishes, quantities, and substitutions.
Record a target opening or reset date, but work backward from delivery, installation, inspection, merchandising, and staff preparation. A fixture arriving on opening day is not an opening-day-ready fixture.
2. Measure and Divide the Store Into Zones
Use a measured plan rather than total square footage. Mark the complete route from the receiving point to the sales floor as well as the final fixture location.
Typical zones include:
| Zone | Main fixture question |
|---|---|
| Entrance and decompression | What should customers see first without blocking entry or sightlines? |
| Feature or promotional zone | Which fixture supports frequent campaign or seasonal changes? |
| Perimeter walls | Does the merchandise need slatwall, gridwall, standards, shelving, outriggers, cases, or a mixed system? |
| Central floor | Do tables, racks, gondolas, or freestanding displays preserve a clear customer path? |
| Apparel storytelling | Are mannequins, faceouts, racks, shelves, and nearby purchasable inventory coordinated? |
| Checkout and service | Is there enough space for transactions, queuing, impulse products, equipment, storage, and accessible service? |
| Fitting room approach | Can customers and staff reach the area without fixtures narrowing the route? |
| Stock and replenishment | Can staff move products safely from storage to the selling floor? |
For each zone, record the usable dimensions, product category, target capacity, customer approach, staff access, fixture family, finish, accessory list, and quantity.
3. Select the Wall Display System
Compare wall displays by what the products require and how permanent the store plan should be.
Slatwall
Consider slatwall when a finished wall needs adjustable hooks, shelves, faceouts, hangrails, baskets, or mixed accessories. Confirm panel construction, groove spacing, insert requirements, finish, edge treatment, mounting method, wall condition, and accessory compatibility for the exact system.
Gridwall
Consider gridwall for fast resets, hook-heavy packaged products, freestanding panels, temporary zones, or utility-led presentation. Confirm panel size, bases, connectors, wall brackets, compatible hooks, baskets, shelves, and planned load with the supplier.
Standards, Outriggers, and Shelving
Use standards, outriggers, or shelving systems where hanging apparel, shelves, perimeter capacity, or a particular fixture style drives the design. Record every upright, bracket, hangbar, shelf, connector, base, end component, and attachment requirement.
Display Cases
Use cases where the product benefits from enclosed presentation, controlled access, lighting, locks, dust protection, or a defined service interaction. Confirm glass type, door operation, locks where selected, lighting and electrical responsibility, packaged dimensions, receiving route, and final placement.
4. Select Floor Fixtures by Role
Compare current floor displays only after each floor zone has a purpose.
- [ ] Use display tables for folded products, tactile shopping, coordinated stories, and promotional features.
- [ ] Use garment racks for hanging inventory, size runs, movable categories, and seasonal capacity.
- [ ] Use gondolas or shelving for structured aisles and higher-capacity product presentation.
- [ ] Use freestanding slatwall or gridwall where a movable accessory system is more useful than a fixed wall.
- [ ] Use dump bins or baskets only where the product and brand can support a less structured presentation.
- [ ] Confirm fixture footprint at full use, including projecting arms, open doors, customer position, and nearby products.
- [ ] Check sightlines from the entrance and checkout before approving fixture height.
Avoid filling every open area. Floor fixtures need circulation and browsing space around them, not just enough room to fit on the drawing.
5. Coordinate Mannequins and Specialty Displays
Mannequins should connect a product story to nearby inventory. Record body form, pose, base, finish, wig or head treatment if applicable, clothing sizes, changing responsibility, security, placement, and the fixture holding purchasable stock.
Specialty displays should solve a defined problem. Before ordering one, answer:
- [ ] What product cannot be displayed effectively on the core fixtures?
- [ ] How often will that product or package size change?
- [ ] Can replacement parts or additional units be sourced later?
- [ ] Does the display require power, graphics, security, anchoring, or special assembly?
- [ ] Who owns the final artwork, content, measurements, and approval?
6. Build the Accessory and Component Schedule
A panel, rack, or case is not a complete merchandising plan. Use a line-by-line schedule for slatwall accessories, gridwall components, shelves, brackets, faceouts, hangrails, hooks, baskets, sign holders, bases, connectors, trim, locks, lighting, and spare hardware.
For every line, record:
- exact product or component;
- compatible system;
- finish and size;
- quantity per fixture or zone;
- total quantity;
- planned merchandise;
- approval status;
- substitution status;
- spare or replacement quantity where appropriate.
Test representative products on the proposed accessory mix when practical. Product width, package holes, garment spacing, shelf depth, and customer handling can expose problems that a fixture image will not.
7. Review Customer Access and Checkout
Keep the route into and through the store, access to goods and services, checkout, fitting rooms, and public facilities in the project review. The U.S. Department of Justice's ADA primer for small businesses explains that retail displays and furniture must not obstruct required accessible routes and that sales and service areas need appropriate access.
This checklist is not an accessibility or code determination. Requirements depend on the building, jurisdiction, project scope, and applicable standards. Have the plan reviewed by the landlord, architect, accessibility professional, fire/code authority, installer, or other qualified party as appropriate.
- [ ] Confirm that display racks, tables, signs, plants, queue hardware, and temporary promotions do not block required routes.
- [ ] Include accessible checkout or service provisions in the initial counter plan.
- [ ] Check door swings, fitting-room approaches, corners, turns, and customer positions around fixtures.
- [ ] Keep exits, fire equipment, electrical panels, and required clearances visible and unobstructed.
- [ ] Recheck access after merchandise, baskets, stools, and promotional displays are loaded.
8. Approve Finishes, Samples, and the Complete Quote
Review physical samples under representative store lighting where practical. Record the exact sample name, product family, supplier, date, and approval decision. A photograph or screen color is not a reliable substitute for an approved physical finish sample.
Compare quotes on a complete basis:
- [ ] fixtures and every required component;
- [ ] accessories and quantities;
- [ ] finish and sample approval;
- [ ] graphics, lighting, locks, or security where selected;
- [ ] freight and delivery assumptions;
- [ ] assembly, installation, anchoring, and electrical scope;
- [ ] exclusions and buyer-supplied work;
- [ ] substitution rules and change approval;
- [ ] quote validity and estimated schedule supplied for the project.
Use Samples & Quotes to submit dimensions, product categories, finish direction, delivery details, and the fixture families being considered.
9. Plan Freight, Receiving, and Installation
Before releasing the order, confirm how each item ships and who is responsible at every handoff.
- [ ] Verify the commercial delivery address, contact, hours, dock or liftgate needs, appointment rules, and restricted access.
- [ ] Measure doors, corridors, elevators, stairs, corners, and the route to the final location using packaged dimensions where available.
- [ ] Prepare a clean, dry staging area and keep shipment records available.
- [ ] Assign someone to count packages, inspect visible condition, photograph concerns, and follow carrier and supplier procedures.
- [ ] Confirm whether fixtures arrive assembled, partially assembled, or knocked down.
- [ ] Identify responsibility for tools, wall attachment, anchors, electrical work, leveling, final placement, and packaging disposal.
- [ ] Keep manufacturer instructions and use qualified installers where the product or site requires them.
- [ ] Allow recovery time for damage, shortages, missing components, adjustment, cleaning, and staff handoff.
The OSHA warehousing and materials-handling guidance provides general workplace-safety context. Supplier instructions, carrier procedures, applicable rules, and qualified professionals should control the actual work.
10. Complete the Opening-Day Handoff
Inspect fixtures before the store is fully merchandised.
- [ ] Compare installed fixtures with the approved floor plan and fixture schedule.
- [ ] Check quantity, finish, placement, level, stability, alignment, shelves, doors, locks, lights, accessories, and visible damage.
- [ ] Photograph the installed condition and list open issues with owners and due dates.
- [ ] Store instructions, keys, spare hardware, touch-up information, and approved drawings where staff can find them.
- [ ] Train staff on adjustment, safe loading, cleaning, lock/light operation, and reporting damage.
- [ ] Load representative merchandise and check real customer and staff movement again.
- [ ] Record what should change before the next location, remodel, or seasonal reset.
Use the Checklist to Request a Better Fixture Quote
A useful quote request includes the measured plan, zone schedule, product mix, fixture categories, accessory requirements, finish direction, delivery conditions, and target project window. That information lets a fixture supplier identify gaps before the order reaches the store.
Print or save this store fixture planning checklist, review the retail store fixtures buyer guide, and submit the project through Samples & Quotes when the initial plan is ready.
FAQ
What fixtures are normally needed for a new retail store?
The mix depends on the merchandise and floor plan. Common categories include wall systems, shelves, hooks, faceouts, garment racks, display tables, cases, counters, mannequins, gondolas, signs, and specialty displays. Most stores need several fixture families with clearly separated roles.
When should fixture planning begin?
Begin after the merchandise and store brief are defined and before construction or purchasing decisions lock in wall conditions, checkout, electrical work, receiving access, and circulation. Early planning makes measurements and responsibilities easier to coordinate.
What should be measured before ordering store fixtures?
Measure the store, each usable wall run, doors, windows, columns, ceiling conditions, receiving route, corridors, corners, elevators, stairs, and final fixture locations. Also record equipment, outlets, fire and life-safety elements, and site conditions that a qualified project professional says must remain clear.
Why is an accessory schedule necessary?
Accessories make wall and floor systems usable. Without quantities for hooks, shelves, brackets, faceouts, hangrails, connectors, bases, and related components, a fixture order can arrive incomplete even when the primary panels or racks are correct.
Should the cheapest fixture quote win?
Not automatically. Compare whether each quote covers the same quantities, components, finishes, accessories, freight assumptions, assembly, installation, exclusions, and approval status. An incomplete low quote can create additional cost later.