
Burnside Wall System Buyer Guide for Retail Stores
The Burnside wall system is a modular upright-based display family that lets retailers combine hanging, shelving, faceout, hook, graphic, and storage functions on one coordinated wall. That breadth makes it relevant for apparel, footwear, accessories, lifestyle goods, and other stores that need the wall to carry both merchandise and brand communication.
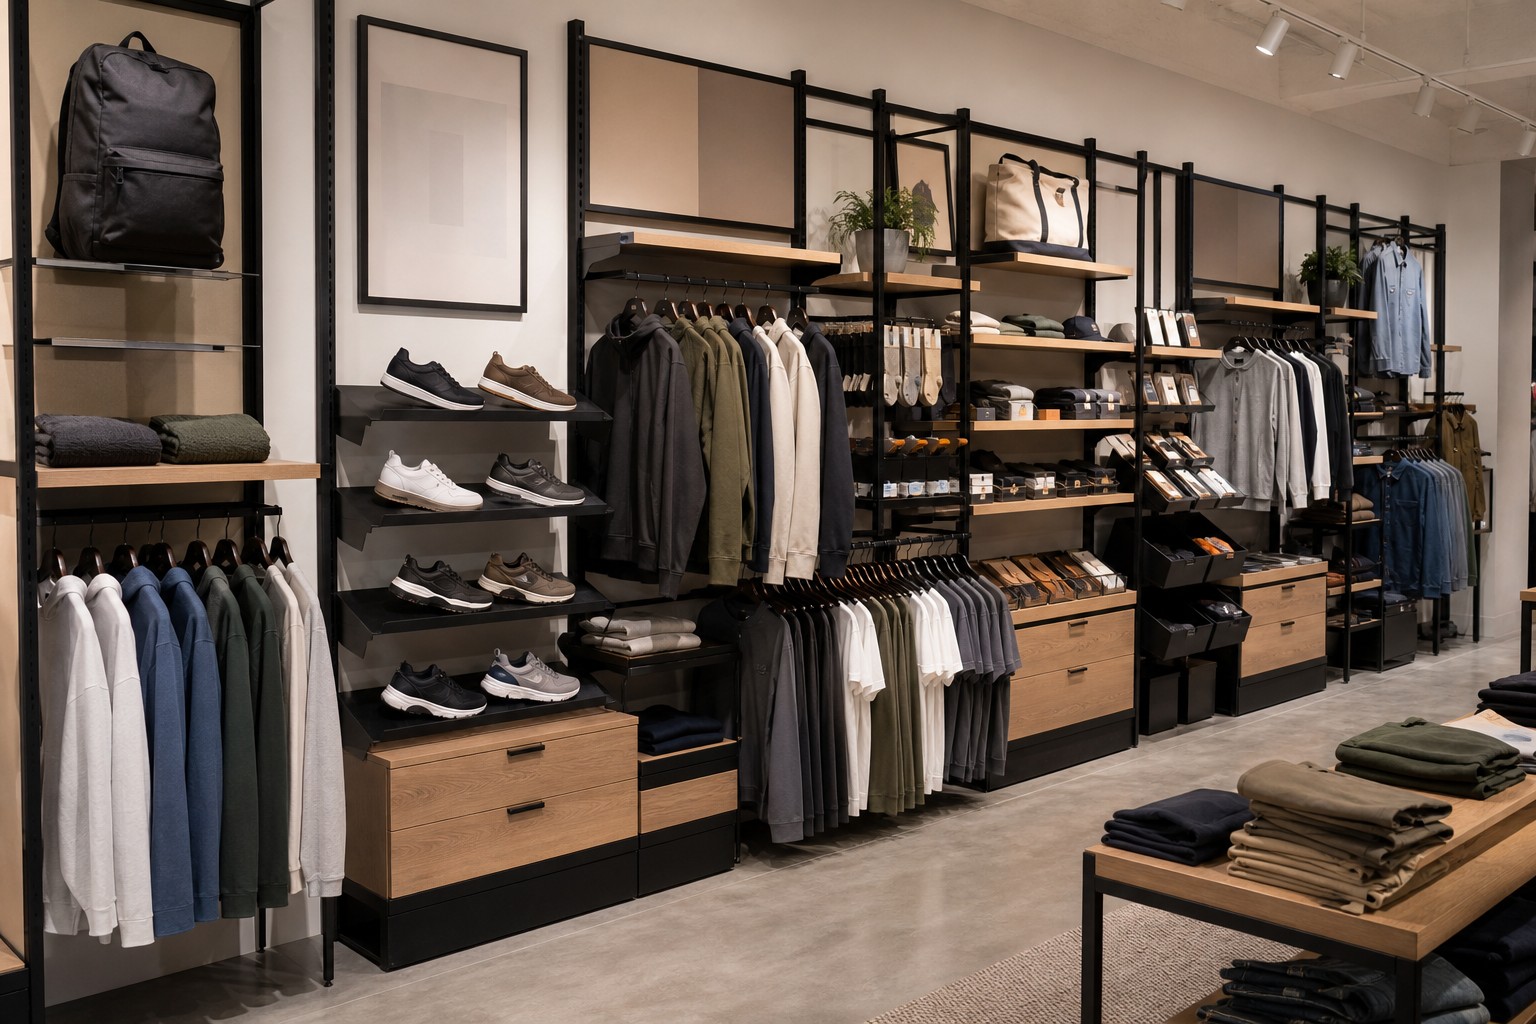
The system should be planned from a wall elevation and product schedule. The number of available accessories is an advantage only when each component has a defined job.
What the Burnside Wall System Includes
Retail Display USA's current Burnside wall system category presents wall uprights and options such as shelves, wood shelves, faceouts, graphic frames, hangbars, back panels, hooks, drawers, waterfalls, outrigger components, and related accessories.
Current dimensions, finishes, prices, compatibility, and mounting requirements vary by product and should be confirmed in the live category and written quote.
The collection supports several display layers:
- primary structure through wall uprights
- hanging capacity through bars and faceouts
- folded or boxed merchandise through shelves
- smaller products through compatible hooks
- visual communication through graphics and sign elements
- visual backing through panel options
- operational support through storage components
Decide What the Wall Must Do
List the wall's responsibilities before selecting components. A single wall may need to:
- carry core inventory
- introduce a new collection
- show complete outfits
- combine apparel and footwear
- provide product information
- hold replenishment supplies
- transition into a fitting or service zone
Rank these jobs. A wall designed primarily for capacity will use a different accessory mix from a brand feature wall.
Plan Uprights and Bays From an Elevation
A wall elevation shows the fixture face-on. Mark the usable width and height, doors, outlets, columns, baseboards, ceiling conditions, and adjacent fixtures. Then divide the wall into merchandise bays.
Each bay should identify:
- product category
- hanging, folded, shelved, or hooked presentation
- feature versus replenishment role
- sign or graphic position
- customer reach
- staff restocking access
Do not derive final spacing from a general description or another retailer's installation. Confirm the current system requirements and the actual wall condition with RDUSA and the installer.
Use Hanging Components for Apparel
Hangbars support side-hung inventory and broader size runs. Faceouts and waterfalls turn selected products toward the aisle. Use them together so the wall combines capacity with feature visibility.
Plan garment length carefully. Long products need clear vertical space. If shelves or storage sit below, confirm that the garments will not touch them.
Use Shelves for Product Stories
Shelves can carry folded apparel, footwear, bags, boxes, and complementary products. The wall can use shelf material and backing choices to influence the visual tone, but the product dimensions and compatible brackets come first.
Avoid filling every available position. Open space helps shoppers understand the display and gives staff room for new product introductions.
Use Graphics and Back Panels Deliberately
Graphic frames can explain a collection, brand, category, or promotion. A graphic should support the merchandise rather than replace it. Plan artwork production, viewing distance, lighting, and change frequency.
Back panels can create a more finished field behind merchandise or separate one department from another. Confirm which panel options belong to the current system and whether they affect installation or accessory use.
Add Storage Where It Improves Operations
Integrated drawers or bins can reduce replenishment trips, but storage should not be added without a clear purpose. Define what will be stored, who needs access, and whether the location conflicts with customer reach or low-level merchandise.
Confirm the component's current configuration, clearances, and compatibility before including it in the elevation.
Compare Burnside With Other Wall Systems
The broader outrigger category and Astoria wall systems provide other ways to organize retail walls.
Compare by:
- visual character
- wall-mounted or freestanding requirement
- accessory range
- graphic and storage needs
- merchandise type
- building conditions
- complete package cost
Do not compare one upright price with a complete wall-system quote. Include all structural pieces, accessories, panels, graphics, freight, assembly, and installation responsibilities.
Test One Complete Merchandise Bay
Build or review one representative bay with the actual product types before repeating the system across a large wall. The test should include the proposed hanging bar, shelf, faceout, sign or graphic, and any back panel or storage component.
Photograph the approved bay and record the component list. This gives the installer and merchandising team a practical reference and helps the buyer identify missing parts, crowded product zones, or difficult replenishment before the full package is finalized.
Check Customer Routes and Product Reach
Shelves, bars, and garments project into the sales floor. Include the complete loaded depth in aisle planning. Keep key products within a comfortable customer reach and provide staff access for replenishment.
The U.S. Access Board's accessible routes guide can support planning discussions, but the project team should confirm all applicable requirements.
Common Wall-System Mistakes
Avoid these errors:
- ordering uprights before completing a merchandise elevation
- adding every available accessory to every bay
- ignoring graphic production and replacement
- placing storage where it blocks products or customers
- assuming accessory compatibility across fixture lines
- failing to confirm wall construction and installation
- comparing incomplete quotes
Prepare an Installation and Merchandising Handoff
Separate the installation drawing from the merchandising plan, but make sure they use the same bay names. The installer needs upright, panel, storage, and structural information. The merchandising team needs product assignments, accessory positions, graphics, and replenishment notes.
At handoff, verify that every component in the quote appears on one of those documents. Label cartons or grouped parts by bay where practical. After installation, inspect alignment, accessory placement, panel condition, drawers, and graphic positions before merchandise is loaded.
This handoff matters on a detailed system because a missing bracket or misplaced graphic can delay an entire wall. A signed bay checklist gives the store team a clear record of what was installed and what still needs correction.
Separate Standard Bays From Special Bays
A detailed wall system becomes easier to quote and operate when the plan identifies repeatable standard bays and a small number of special bays. Standard bays can carry core assortment using a consistent accessory schedule. Special bays can support feature products, graphics, storage, or a merchandise category with different display needs.
Label each bay type on the elevation and fixture schedule. This reduces accidental over-ordering and helps installers place the right components in the right area. It also gives the visual merchandising team a clear reset framework: core bays remain stable while feature bays change with launches, promotions, or seasonal assortment.
Frequently Asked Questions
What products can a Burnside wall system display?
Its accessory categories can support hanging apparel, folded products, footwear, accessories, graphics, and related merchandise when the exact components fit the product.
Does every bay need a back panel?
No. Back panels are a design and merchandising choice. Use them where they improve the visual field or department structure, subject to current system compatibility.
Can storage be included in the wall?
The current category includes storage-related components. Confirm the exact product, dimensions, access, and compatibility before planning it.
What should be included with a quote request?
Provide wall measurements and photographs, a merchandise elevation, accessory needs, graphic and storage requirements, finish direction, delivery details, and installation context.
Build the Burnside Wall by Job
The Burnside wall system can carry several merchandise and communication roles in one coordinated structure. The strongest wall uses that flexibility selectively, with each bay assigned a clear job.
Review the current Burnside wall components and use Samples and Quotes to confirm the wall plan, accessories, finish, freight, and installation requirements.