
How to Display T-Shirts at a Trade Show
How to display t-shirts at a trade show: feature a small number of strongest designs face-forward, keep matching sizes directly below or behind each sample, and choose portable fixtures that fit the booth after merchandise is loaded. The display should be visible from the aisle without blocking visitors, staff, or inventory access.
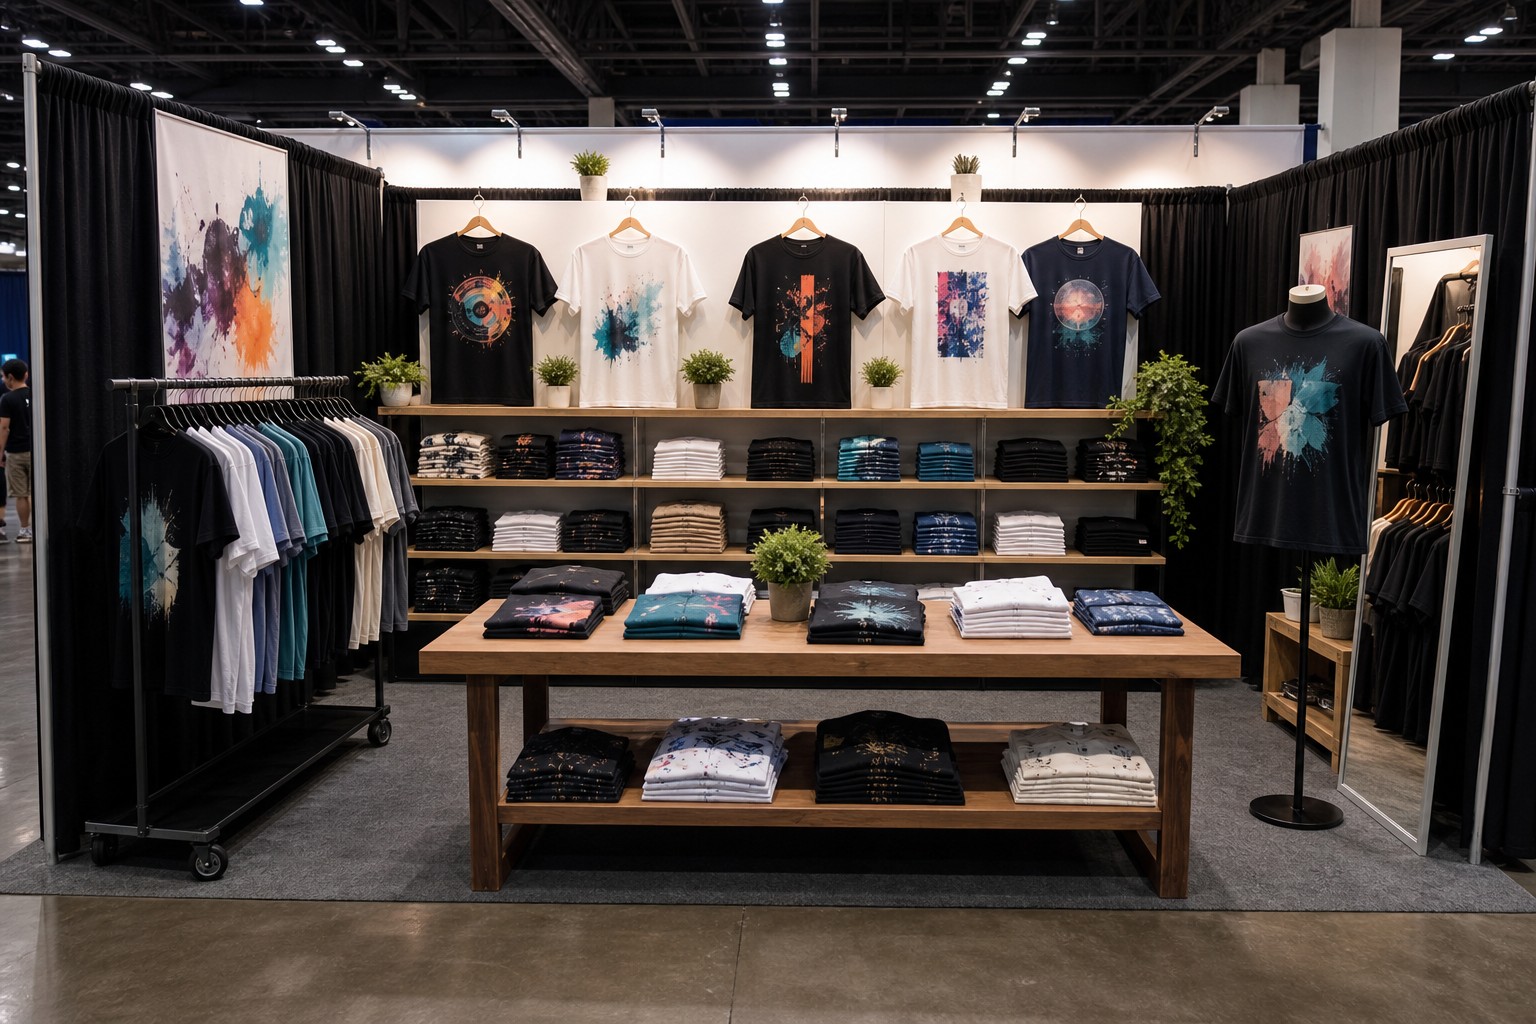
Trade-show merchandising is different from permanent-store merchandising. A booth has tighter space, limited setup time, temporary inventory, venue requirements, and a short window to attract attention. The best display is not necessarily the one that holds the most shirts. It is the one visitors can understand quickly and staff can operate throughout the event.
Start With the Booth Footprint
Before choosing fixtures, mark the full booth dimensions and identify the entrance, neighboring booths, electrical access, storage area, and any venue restrictions. Then plan the loaded fixture footprint.
A rack or panel becomes deeper after hangers, faceouts, hooks, and shirts are added. A table also needs customer standing space. Leave a clear route into and out of the booth and avoid creating a narrow dead end around the payment or conversation area.
The booth should support three actions:
- notice the shirts from the aisle
- compare designs and sizes
- complete the purchase or conversation without congestion
Show the Graphic Before the Inventory
Most event visitors decide whether to stop based on the design, not the folded stack. Use a forward-facing sample to show the graphic clearly. Keep the sellable size run close to that sample so the visitor can move from interest to selection without searching across the booth.
Review t-shirt display options for product-specific presentation ideas. Confirm dimensions, assembly, portability, finish, and intended use before treating a fixture as part of a traveling setup.
Avoid showing every design at equal prominence. Choose the products most likely to attract visitors, then use a secondary zone for additional options.
Compare Trade-Show Display Formats
| Format | Best use | Main caution |
|---|---|---|
| Face-forward T-shirt display | Showing graphics clearly from the aisle | Needs nearby size inventory |
| Rolling rack | Hanging multiple sizes or styles with mobility | Loaded depth and garment crowding |
| Display table | Folded stock, bundles, or checkout support | Can become cluttered or block entry |
| Freestanding gridwall | Flexible vertical presentation with compatible accessories | Base footprint, stability, and projecting hooks |
| Bins or backstock containers | Organizing replenishment inventory | Should not replace the customer-facing display |
Use Rolling Racks for Flexible Hanging Inventory
A rolling rack may suit exhibitors who need hanging size runs or want to reposition inventory during setup. Review current rolling racks and confirm dimensions, assembly, mobility, and intended load guidance for the selected product.
Do not pack garments so tightly that visitors cannot separate sizes. Group shirts in a predictable sequence and use a face-forward sample elsewhere in the booth to show the graphic. Lock or secure mobile components as directed by the product instructions.
Use Display Tables as Controlled Selling Zones
A table can hold folded inventory, coordinated accessories, or checkout materials, but it should not become the entire booth. Use display tables as edited selling surfaces with shallow stacks and clear product groups.
Keep backup stock under control and out of the customer path. If inventory is stored below the table, staff should be able to reach it without repeatedly crossing in front of visitors.
Use Gridwall for a Flexible Vertical Display
Freestanding grid panels may help show suitable hanging products or packaged accessories while preserving table space. Select accessories from the actual merchandise and confirm panel compatibility.
Measure the base, accessory projection, and loaded product depth. Hooks or faceouts placed near the booth entrance can catch clothing or bags if the path is too narrow.
Organize Sizes for Fast Service
Trade-show visitors may not spend long searching. Use the same size sequence everywhere and make it easy for staff to answer whether a design is available.
Practical approaches include:
- one labeled stack per size
- one hanger sequence from smaller to larger sizes
- a sample shirt with matching stock directly below
- separate backstock containers for replenishment
- a simple staff inventory list
Do not use labels or signs that make unsupported claims about availability. Update sold-out information during the event so the display remains accurate.
Plan the Booth From the Aisle Inward
Place the strongest visual at the aisle edge without projecting into the aisle. Use the middle of the booth for comparison and the rear or side for inventory and staff operations.
If the booth is shallow, avoid placing a deep table across the full entrance. If it is wider, create two clear product zones with an open center path. The visitor should not have to step around a rack to understand what is being sold.
Build for Setup and Pack-Down
Create a component checklist before the event:
- fixture parts and approved hardware
- hangers and compatible accessories
- representative samples
- size-organized inventory
- labels and price information
- protective packing materials
- tools required by the manufacturer's instructions
Photograph the completed test setup before transport. This gives staff a reference and helps identify missing parts before the venue setup window.
Common Trade-Show Display Mistakes
The first mistake is bringing too many designs. An edited range is easier to see and easier to replenish.
The second is relying only on folded stacks. Visitors should be able to see the graphic from the aisle.
The third is planning from empty fixture dimensions. Loaded shirts, hangers, hooks, and baskets add depth.
The fourth is hiding sizes in unrelated containers. Inventory should follow the same order as the customer-facing display.
The fifth is ignoring venue rules. Confirm booth boundaries, fixture requirements, setup access, and event-specific restrictions with the organizer.
Frequently Asked Questions
What is the best way to display T-shirts at a trade show?
Show selected graphics face-forward and keep organized size inventory immediately nearby. Use portable fixtures appropriate to the venue and leave a clear visitor path.
Should trade-show T-shirts be folded or hung?
Use both when practical. A face-forward or hanging sample shows the design, while folded stock can hold the size run efficiently.
Are rolling racks good for trade shows?
They may be useful when the selected rack fits the booth and transport plan. Confirm dimensions, mobility, assembly, and product-specific guidance.
Can gridwall be used in a trade-show booth?
Freestanding gridwall may support a flexible display when the panel, base, accessories, loaded footprint, and venue rules are suitable.
How many T-shirt designs should be displayed?
Display enough to communicate the range without making the booth difficult to scan. The correct number depends on booth size, graphic complexity, and inventory plan.
Final Recommendation
How to display t-shirts at a trade show comes down to fast visual understanding, organized sizes, and a booth that remains easy to enter and operate. Test the full loaded setup before travel, feature the strongest graphics, and keep replenishment inventory close to each sample. Review RDUSA t-shirt displays and send booth dimensions, transport constraints, shirt quantities, and preferred fixture types through Samples & Quotes.
Event Planning Resource
The International Association of Exhibitions and Events provides education and industry resources for exhibition and event planning.